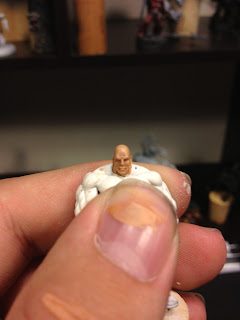
I was recently asked about how to paint flesh and thought it'd be an excellent time to show off the Andrea Flesh Kit.
Tonight we will be painting the face of Wolf the Barbarian from Hasslefree.
So we begin with a nice tidy work space and everything we need within reach. For this tutorial I used:
-Andrea Don't Mix Just Paint Flesh Set
-Games Workshop Violet Shade
-Reaper Master Series Flow Improver
-Windsor & Newton Miniature Series Size 2
-Windsor & Newton Miniature Series Size 000
-Games Workshop Basecoat Brush
-Soda Bottle Caps
I begin by priming the miniature white. This was done using Citadel Skull White Primer from Games Workshop. Now this guy had been previously primed and was awaiting stripping when chosen for this tutorial, so because of this the final product is not as smooth as it could be.
On my palette I lay out my colours. and number them from 1 to 6, leaving empty wells to mix paint in.
Yes I realize I said this is a Don't Mix, Just Paint set but without mixing we won't have smooth blends.
We add Flow Improver to each paint and mix it together until it has the consistency of melted butter.
Then I cover it with a bottle cap.
This prevents the paint from drying out under the lamps while we paint. Credit for this idea goes to Bogusz Stupnicki. (CMoN: Bohun)
Our basecoat will be 3 parts Andrea Colour 1 and 2 parts Colour 2.
I use several thin layers to apply the paint until I get a nice even coverage.
Once I have an even coat of paint, I apply the first highlight consisting of pure Colour #2.
Using a mix of Colour #2 and Colour #3 I continue to highlight the face. Picking out the prominent features like the nose, forehead, and eyebrows.
I continue to work around my wheel of colours, adding more highlights using 50/50 mixes.
The highlights will look a little rough at these stages, but we'll smooth them out later.
The photo above is a highlight of pure Colour #3.
Continuing with the pattern, we highlight with 50/50 of Colour #3 and #4.
Finally we reach pure colour #4. This should be used in the most prominent places. Top of the head, tip of the nose, eyebrows and ear tips.
Now we blend our highlights in by going in the opposite way on the wheel. I work backwards from Colour #4 back to our basecoat. This stage is done with thin glazes. Ratio roughly 1:4 Paint to Flow Improver.
I can now begin my shadows. I use a mix of the basecoat with Colour #5 on the wheel. To give depth the the face I apply a thin glaze over the eye brows and around the temples, as well as the underside of the cheeks and eye sockets.
I continue to add more of Colour #5 to my mixture and apply it deeper into the recess of the face.
Finally I add in Colour #6 for the final shadows. This is applied to the bridge of the nose, a fine line above the eyebrows, sides of the temples, eye sockets, and under the lip and cheek bones.
All that remains is to pick out some details and paint the eyes. For my Barbarian I chose green.
Here is the finished product. I added some stubble to his head and chin.
I will work on getting a translation list to convert the colours to GW and other Ranges!
Please share your own in the comments!
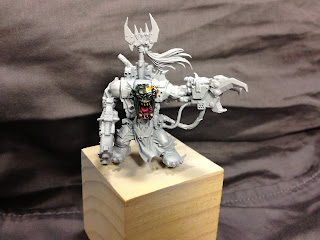
Tonight I also applied some paint to the Warboss whose base I showed earlier in the week.
Good night/morning everyone!
William


No comments:
Post a Comment